

Hello Docker CI / CD - Travis
Intro
Manually running builds, executing tests and deploying can become a nightmare and an error-prone process:
- Human errors easily slip in.
- As soon as the project grows, build processes tend to get more and more complex.
- Knowing which version is running in which environment is not straightforward.
- Switching versions is not straightforward.
What if:
- Builds could be automated, including getting green flags indicators (e.g. running tests)
- Build processes could be triggered whenever a merge to a given branch is done or a push to server.
- Each build would generate a complete Docker image container, so we don't have to worry about server pollution or not having the exact versions of software installed.
- It won't take up much space since we will start from a previous Docker image that has got all the S.O. and software preinstalled.
- We can upload it to a cloud hub registry, allowing the cloud hub to consume it from any local or cloud provider (Amazon, Azure, Google Cloud...)
- You could easily swap different build versions.
That's the benefit you get of configuring a CI/CD server (in this post we will use Travis) and mixing it up with Docker container technology.
This is the second post of the Hello Docker series, the first post is available in this link.
TL;DR;
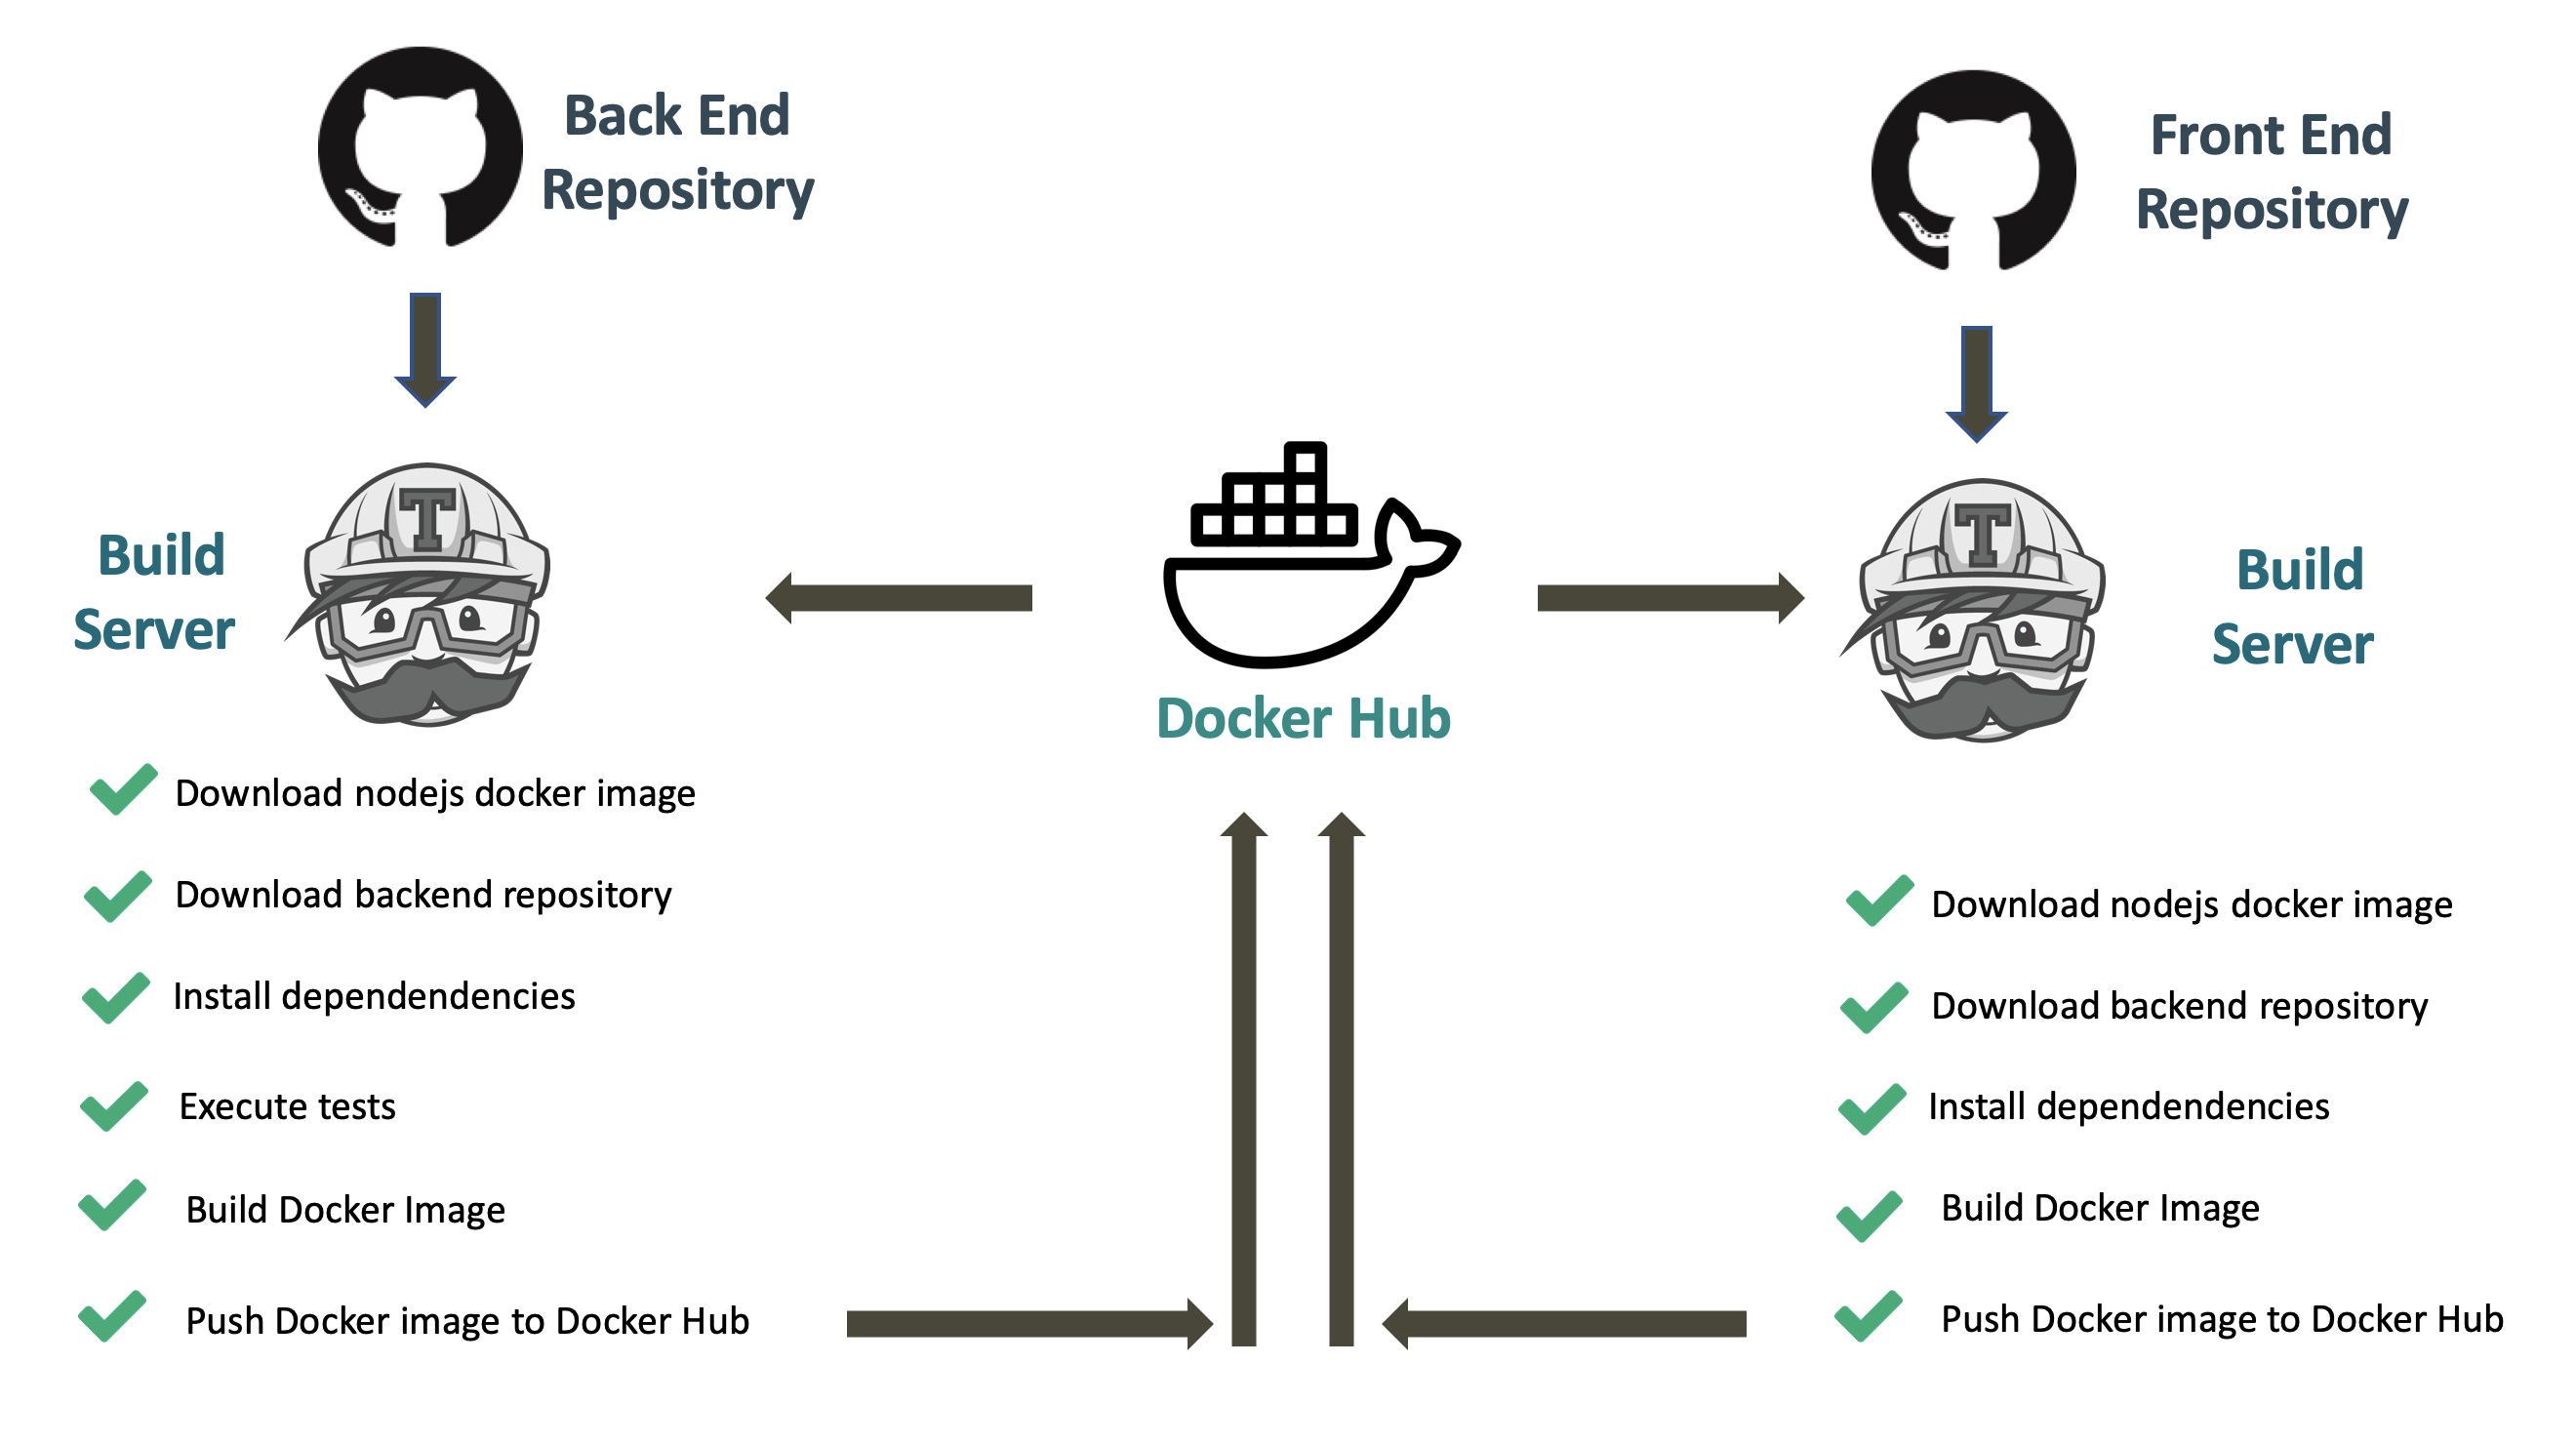
In this post we will use Travis to automatically trigger the following processes on every merge to master or pull request:
- Fire up a clean linux + nodejs instance.
- Download the repository source code.
- Install the project dependencies.
- Execute the associated unit tests.
- Generate a docker image including the production build.
- Tag it and Publish it into the Docker Hub registry.
We will configure this for both a Front End project and a Back End project.
If you want to dig into the details, keep on reading :)
Agenda
Steps that we are going to follow:
- We will present the sample project.
- We will work manually with Docker hub.
- We will link our github project to Travis.
- We will setup a basic CI step
- We will check our unit tests.
- We will check if the docker container can be build.
- We will upload a container to docker hub registry (including build number).
- We will check if our Continuous Delivery process succeeded by consuming those images from our docker compose file configuration.
Sample project
A Chat app will be taken as an example. The application is split into two parts: client (Front End) and server (Back End), which will be containerized using Docker and deployed using Docker Containers.
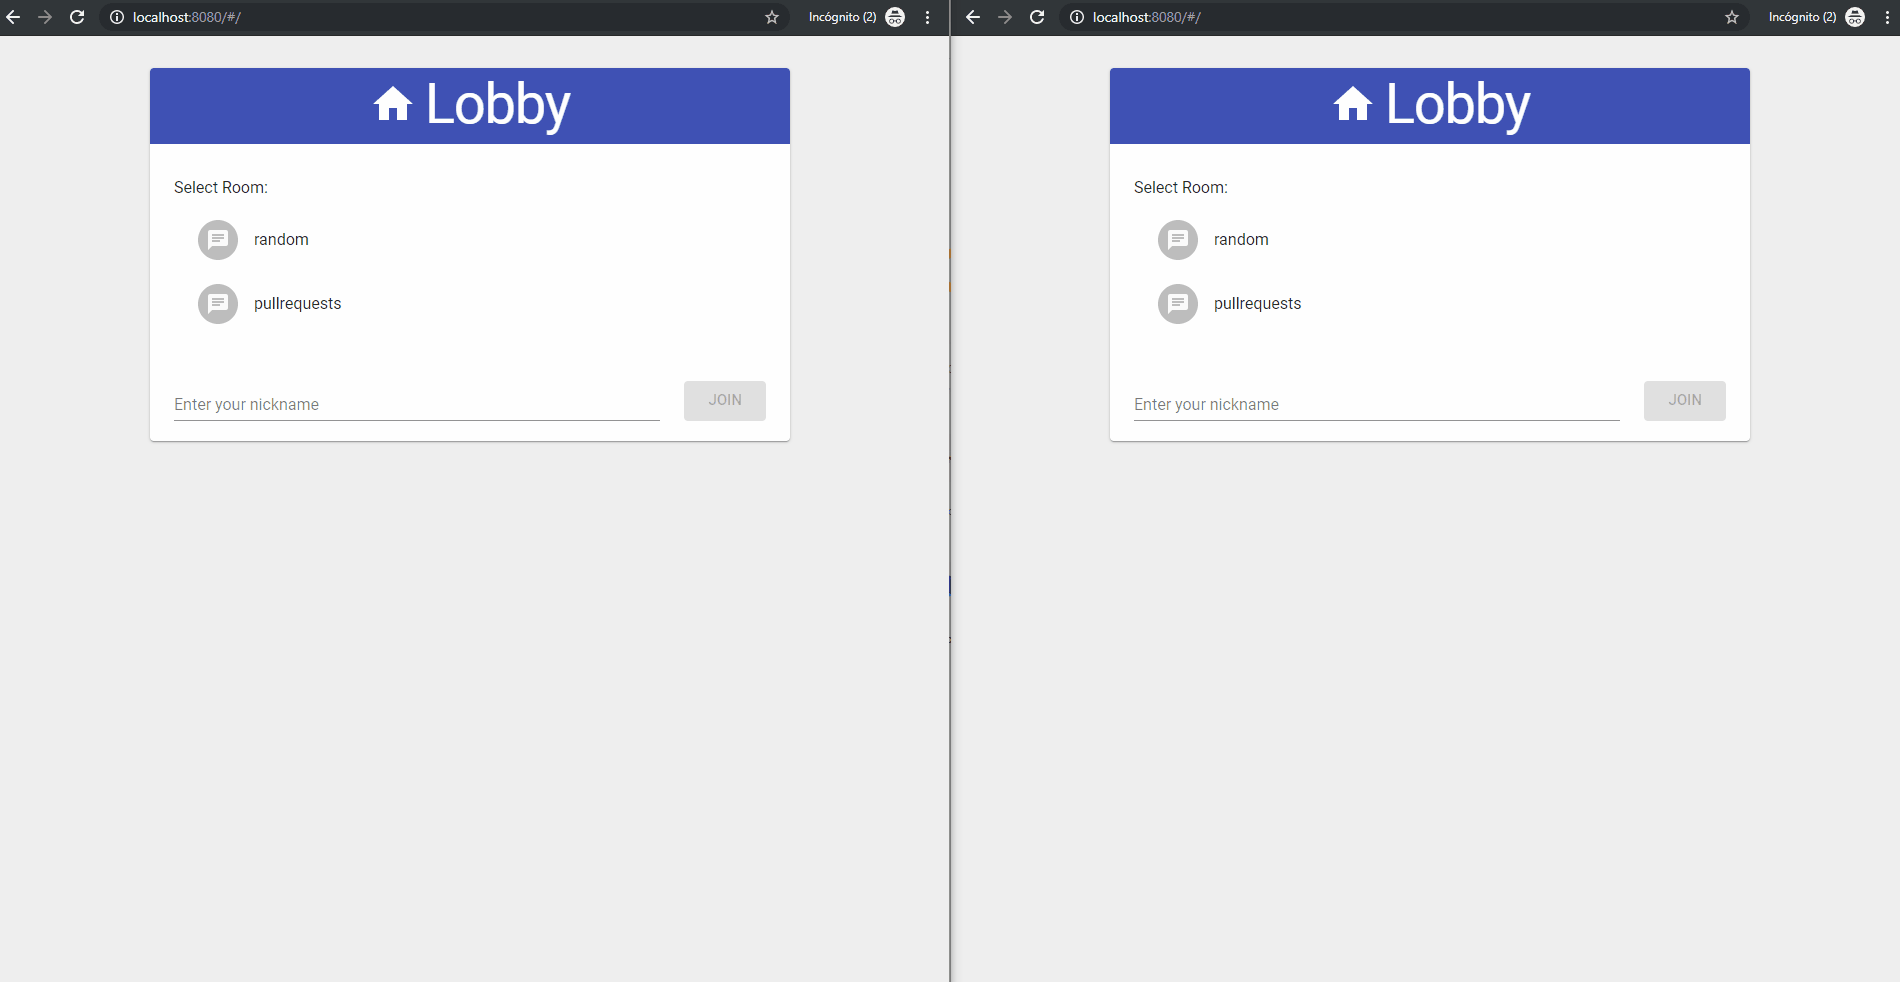
We already have a couple of repositories that will create a chat application together.
Following our actual deployment approach (check previous post in this series), a third part will be included as well: a load balancer - its responsibility will be to route the traffic to the front or back depending on the requesting url. The load balancer will also be containerized and deployed using a Docker Container.
Docker hub
In our last post we took an Ubuntu + Nodejs Docker image as our starting point; it was great to retrieve it from Docker Image and to have control of which version you're downloading.
Wouldn't it be cool to be able to push our own images to that Docker Hub Registry including versioning? That's what Docker Hub offers you: you can create your own account and upload your Docker Images there.
Advantages of using Docker Hub:
- You can maintain several versions of your container images (great to keep different environments, A/B testing, canary deployment, green blue deployment, rolling back, ...).
- Since Docker is based on a small layer foot print our custom images won't take up much size, e.g. a given container built on top of a linux container won't ship the OS, it will only point to that previous image).
- Your container image is already in the cloud, so deploying it to cloud provider is just a piece of cake.
Docker Hub is great to get started: you can create an account for free and upload your docker images (free version has a restriction: you get unlimited public repositories and one private repository).
If later on you need to use it for your business purposes and keep and restrict the access, you can use a private Docker registry, some providers:
- Docker Hub Enterprise.
- Quay.io
- Amazon ECR
- Azure ACR
- Google Cloud.
- Gitlab.
- ...
Travis
Although Docker helps us standardize the creation of a given environment and configuration, building new releases manually can become a tedious and error-prone process:
- We have to download the right cut of code to be built.
- We have to launch all the automated tests and check if they are passing.
- We have to generate our Docker image.
- We have to add some proper versioning (tagging in Docker terms).
- We have to manually push it to Docker Hub registry.
Imagine doing that manually on every merge to master; you will get sick of this deployment hell... Is there any automated way to do that? Travis to the rescue!
Just by spending some time creating an initial configuration, Travis will automatically:
- Get notified of any PR or merge to master being triggered (you can configure policies).
- Create a clean environment (e.g. in our case it takes an Ubuntu + Nodejs image).
- Download the right branch cut from the repository.
- Execute the tests.
- Create the docker container image that will contain the production build.
- On success deploy it to Docker Hub registry (adding a version tag).
One of the advantages of Travis is that it's quite easy to setup:
- You don't need to install any infrastructure (it's just cloud base).
- The main configuration is done via a yml file.
- It offers a community edition where you can play with your tests projects or use it for your open source projects (only public projects).
- It offers an enterprise version for your private projects.
Accounts setup
Forking sample projects
If you want to follow this tutorial you can start by forking the Front End and Back End repos:

- Front End: https://github.com/Lemoncode/container-chat-front-example
- Back End: https://github.com/Lemoncode/container-chat-back-example
By forking these repos, a copy will be created in your github account and you will be able to link them to your Travis account and setup the CI process.
Docker Hub signup
In our previous post from this series we consumed an image container from Docker Hub. If we want to upload our own image containers to the hub (free for public images), we need to create an account, which you can do in the following link.
Travis signup
Travis offers you two portals:
- travisci.org: It allows you to add CI/CD to your open source projects for free.
- travisci.com: It allows you to add CI/CD to your private projects at a cost.
Since we are using Travis for learning purposes, let's hop on into travisci.org.
The next step that we have to take is to link our Github account to Travis (sign in with Github). By doing this:
- We just have our account created in Travis.
- We authorize Travis to pull information from our repository (e.g. download repo to execute CI/CD).
- We authorize Travis to receive notifications from your repository (e.g. showing if build passed for a given branch).
- Github can check build status from Travis (e.g. indicate if a given Pull Request has passed the CI process).
Let's get started
In this tutorial, we will be applying automation to our forked chat application's repositories using a Travis Pipeline. Travis will launch a task after every commit where the following tasks will be executed:
- Tests will be run.
- The application will be containerized using Docker.
- The created image will be pushed to a Docker Registry, Docker Hub in our case.
Manually uploading an image to Docker Hub
Before we start automating stuff, let's give the manual process a try.
Once you have your Docker Hub account, you can interact with it from your shell (open your bash bash terminal, or windows cmd).
You can log into to Docker Hub.
$ docker loginIn order to push your images, they have to be tagged according to the following pattern:
<Docker Hub user name>/<name of the image>:<version>The version is optional. If none is specified, latest will be assigned.
$ docker tag front <Docker Hub user name>/frontand finally push it
$ docker push <Docker Hub user name>/frontFrom now on, the image will be available for everyone's use.
$ docker pull <Docker Hub user name>/frontTo create the rest of the images that we need, we have to follow the exact same steps.
This can become a tedious and error-prone process. In the following steps we will learn how to automate this using Travis CI/CD.
Linking Travis repo and docker hub credentials
First you have to activate your repositories in Travis.
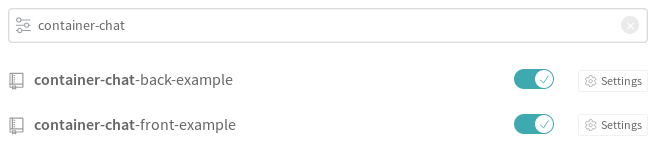
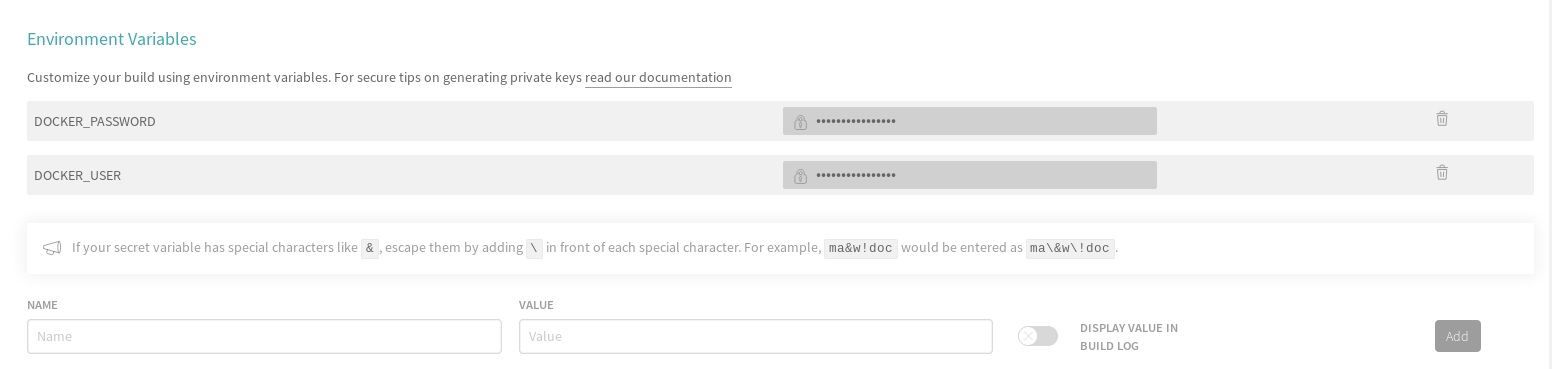
Once they are activated, you need to enter in each of the project settings (Back and Front) and enter your Docker Hub user and password as environment variables. This action has to be done in both repositories.
Front

Back

These variables will be used later to log into Docker Hub (note down: the first time you enter the data in these environment variables, they are shown as clear text. Once you set them up, they are shown as a password field).
Possibly, the repo that you have just forked is not browsed in your Travis account. You can try to sync your Travis account with your Github account manually, by clicking on the Sync button.

Now we can finally begin to automate our tasks.
Travis configuration
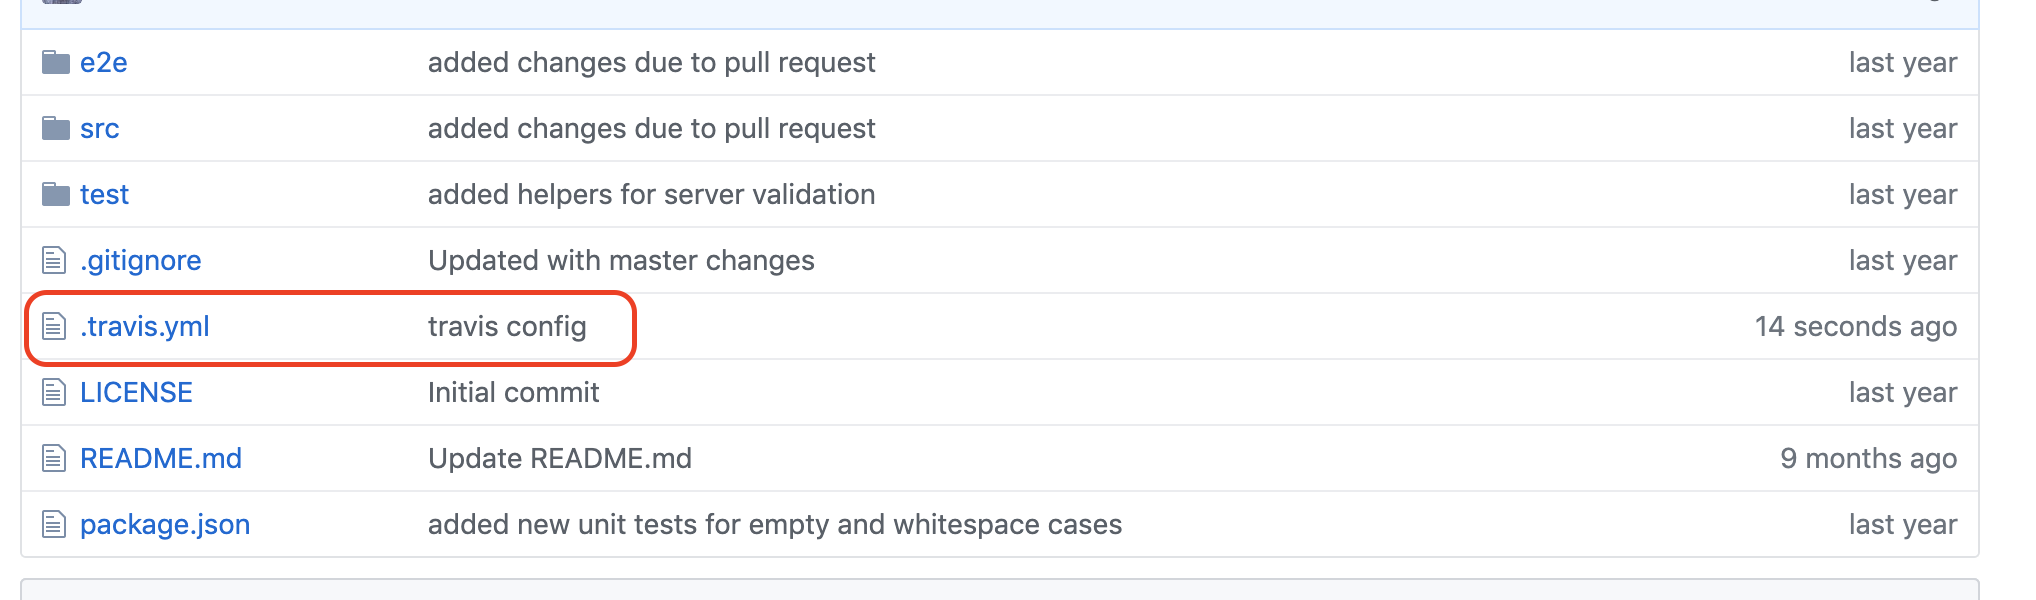
To configure Travis, we need to create a file named .travis.yml in the root folder of your project. This is where we'll describe the actions that will be executed by Travis.
Since we have already linked both Back End and Front End repositories in Travis, it will automatically check when these yml files are available and parse them.
Back End
The steps to create the .travis.yml file for the back end application are the following:
- Choose Language and Version: in this case we are going to choose nodejs (other entries available: ruby, java, python...).
- Docker Service: indicate Travis that we are going to make use of Docker (travis CI can run, build docker images and push images to a container registry).
- Install Dependencies: like in a local environment, we can just execute npm install.
- Test Application: in our case we will run the unit tests that have been implemented for the application.
- Build Docker Image: if tests pass, we just create the container image (this will search for a Dockerfile file at the root of your repository and follow the instructions from that file to create a production build, storing it in a Docker image container).
- Log into Docker Hub: before pushing the generated image to the Docker Hub Registry we need to login into Docker Hub.
- Tag Docker Images: We need to identify the container image with a given tag.
- Push Docker Images: push the generated image to the Docker Hub registry.
A summary of this build process:

1. Choose Language and Version
Let's create our .travis.yml file at the root of our backend repository:
We will start by indicating that we are going to use nodejs as our language, then we will indicate that we are using nodejs version 12 (more information about languages in this link).
./travis.yml
+ language: node_js
+ node_js:
+   - "12"
2. Docker Service
First we will ask to run the commands as sudo (administrator), just in case any of the commands we are running need elevated privileges.
To use Docker we need to request it as a service in the yml file.
./travis.yml
language: node_js
node_js:
  - "12"
+ sudo: required
+ services:
+   - docker
3. Install dependencies
So we've got our ubuntu + nodejs machine up and running. Then we indicate that we want to use Docker. Travis has already downloaded our project source code from the repository, so now it's time to execute an npm install before we start running the tests.
To execute this before main scripts are run (e.g. run tests), Travis offers us the section beforescript. Inside that section we enclose the command _npm install.
./travis.yml
language: node_js
node_js:
  - "12"
sudo: required
services:
  - docker
+ before_script:
+   - npm install
4. Test Application
All the plumbing is ready, so now we can start defining our main scripts. Let's add a Travis yml section called script and inside that section let's add an npm test command; this will just run all the tests from our test battery.
./travis.yml
language: node_js
node_js:
  - "12"
sudo: required
services:
  - docker
before_script:
  - npm install
+ script:
+   - npm test
5. Build Docker Image
If the tests have passed successfully, we are ready to build the Docker image. In the previous post we created a Dockerfile configuring the build steps. Let's copy the content of that file and place it at the root of your repository (filename: Dockerfile).
./Dockerfile
FROM node
WORKDIR /opt/back
COPY . .
RUN npm install
EXPOSE 3000
ENTRYPOINT ["npm", "start"]
Just as a reminder about this Dockerfile configuration:
- FROM node We're setting up the base image from node Docker Hub image.
- WORKDIR /opt/back We're setting up the work directory on /opt/back.
- COPY . . Copy content in container. The point where it is copied will be on selected working directory /opt/back.
- RUN npm install Add dependencies.
- EXPOSE 3000 Notification about what port is going to expose our app.
- ENTRYPOINT ["npm", "start"] Command to start our container.
Let's jump back into the Travis yml file: inside the script section, right after the npm test, we add the command to build the Docker Container image.
./travis.yml
language: node_js
node_js:
  - "12"
sudo: required
services:
  - docker
before_script:
  - npm install
script:
  - npm test
+ - docker build -t back.
This command will search for the Dockerfile file that we have just created at the root of your backend repository, and follow the steps to build it.
Hey! I've just realized something strange is going on: you are using different containers to get started, Travis runs the test on a given linux instance and the Dockerfile uses another linux / node configuration pulled from the Docker Hub Registry. That's a bad smell, isn't it? You are totally right! Both Travis yml and the Dockerfile configuration should start from the same image container. We need to make sure that the test runs in the same configuration as we would have in production - that's a limitation on the free version of Travis.org (here you can find some workarounds). The paid version allows you to configure the image container you want to get as a starting point, more information in this link.
6. Log into Docker Hub
Right after all the scripts have been executed and the docker image has been generated, we want to upload the *Docker image** to the *Docker Hub Registry\*.
Travis yml exposes a section called aftersuccess. This section is only executed if all the steps in the _script section executed successfully. Under this section we are going to take the steps to upload the image to the docker registry.
The first step is to login into the docker hub (we will make use of the environment variables we added into our project Travis configuration, see section Linking Travis repo and docker hub credentials in this post).
./travis.yml
language: node_js
node_js:
  - "12"
sudo: required
services:
  - docker
before_script:
  - npm install
script:
  - npm test
  - docker build -t back .
+ after_success:
+   - docker login -u $DOCKER_USER -p $DOCKER_PASSWORD
7. Tag Docker Images
The current Docker image that we have generated has the following name: back. In order to upload it to Docker Hub registry, we need to add a more elaborated and unique name:
- Let's prefix it with the docker user name.
- Let's add a suffix with a unique build number (in this case $TRAVISBUILDNUMBER).
On the other hand, we will indicate that the current image that we have generated is the latest docker image available.
In a real project, this could vary depending on your needs.
./travis.yml
language: node_js
node_js:
  - "12"
sudo: required
services:
  - docker
before_script:
  - npm install
script:
  - npm test
  - docker build -t back .
after_success:
  - docker login -u $DOCKER_USER -p $DOCKER_PASSWORD
+ - docker tag back $DOCKER_USER/back:$TRAVIS_BUILD_NUMBER
+ - docker tag back $DOCKER_USER/back:latest
8. Push Docker Images
Now that we've got unique names, we need to push the Docker Images into the Docker Registry. We will use the docker push command for this.
Note down that first of all we are pushing the $DOCKERUSER/back:$TRAVISBUILDNUMBER_ image, and then the $DOCKERUSER/back:latest_ . Doesn't this mean that the image will be uploaded twice? The answer is no. Docker is smart enough to identify that the image is the same, so it will assign two different "names" to the same image in the Docker Repository.
./travis.yml
language: node_js
node_js:
  - "12"
sudo: required
services:
  - docker
before_script:
  - npm install
script:
  - npm test
  - docker build -t back .
after_success:
  - docker login -u $DOCKER_USER -p $DOCKER_PASSWORD
  - docker tag back $DOCKER_USER/back:$TRAVIS_BUILD_NUMBER
+  - docker push $DOCKER_USER/back:$TRAVIS_BUILD_NUMBER
  - docker tag back $DOCKER_USER/back:latest
+  - docker push $DOCKER_USER/back:latest
The final result
The final .travis.yml should look like this:
./.travis.yml
language: node_js
node_js:
  - "12"
sudo: required
services:
  - docker
before_script:
  - npm install
script:
  - npm test
  - docker build -t back .
after_success:
  - docker login -u $DOCKER_USER -p $DOCKER_PASSWORD
  - docker tag back $DOCKER_USER/back:$TRAVIS_BUILD_NUMBER
  - docker push $DOCKER_USER/back:$TRAVIS_BUILD_NUMBER
  - docker tag back $DOCKER_USER/back:latest
  - docker push $DOCKER_USER/back:latest
Now if you push all this configuration to Travis it will automatically trigger the build (you can manually trigger a build from the Travis web UI).
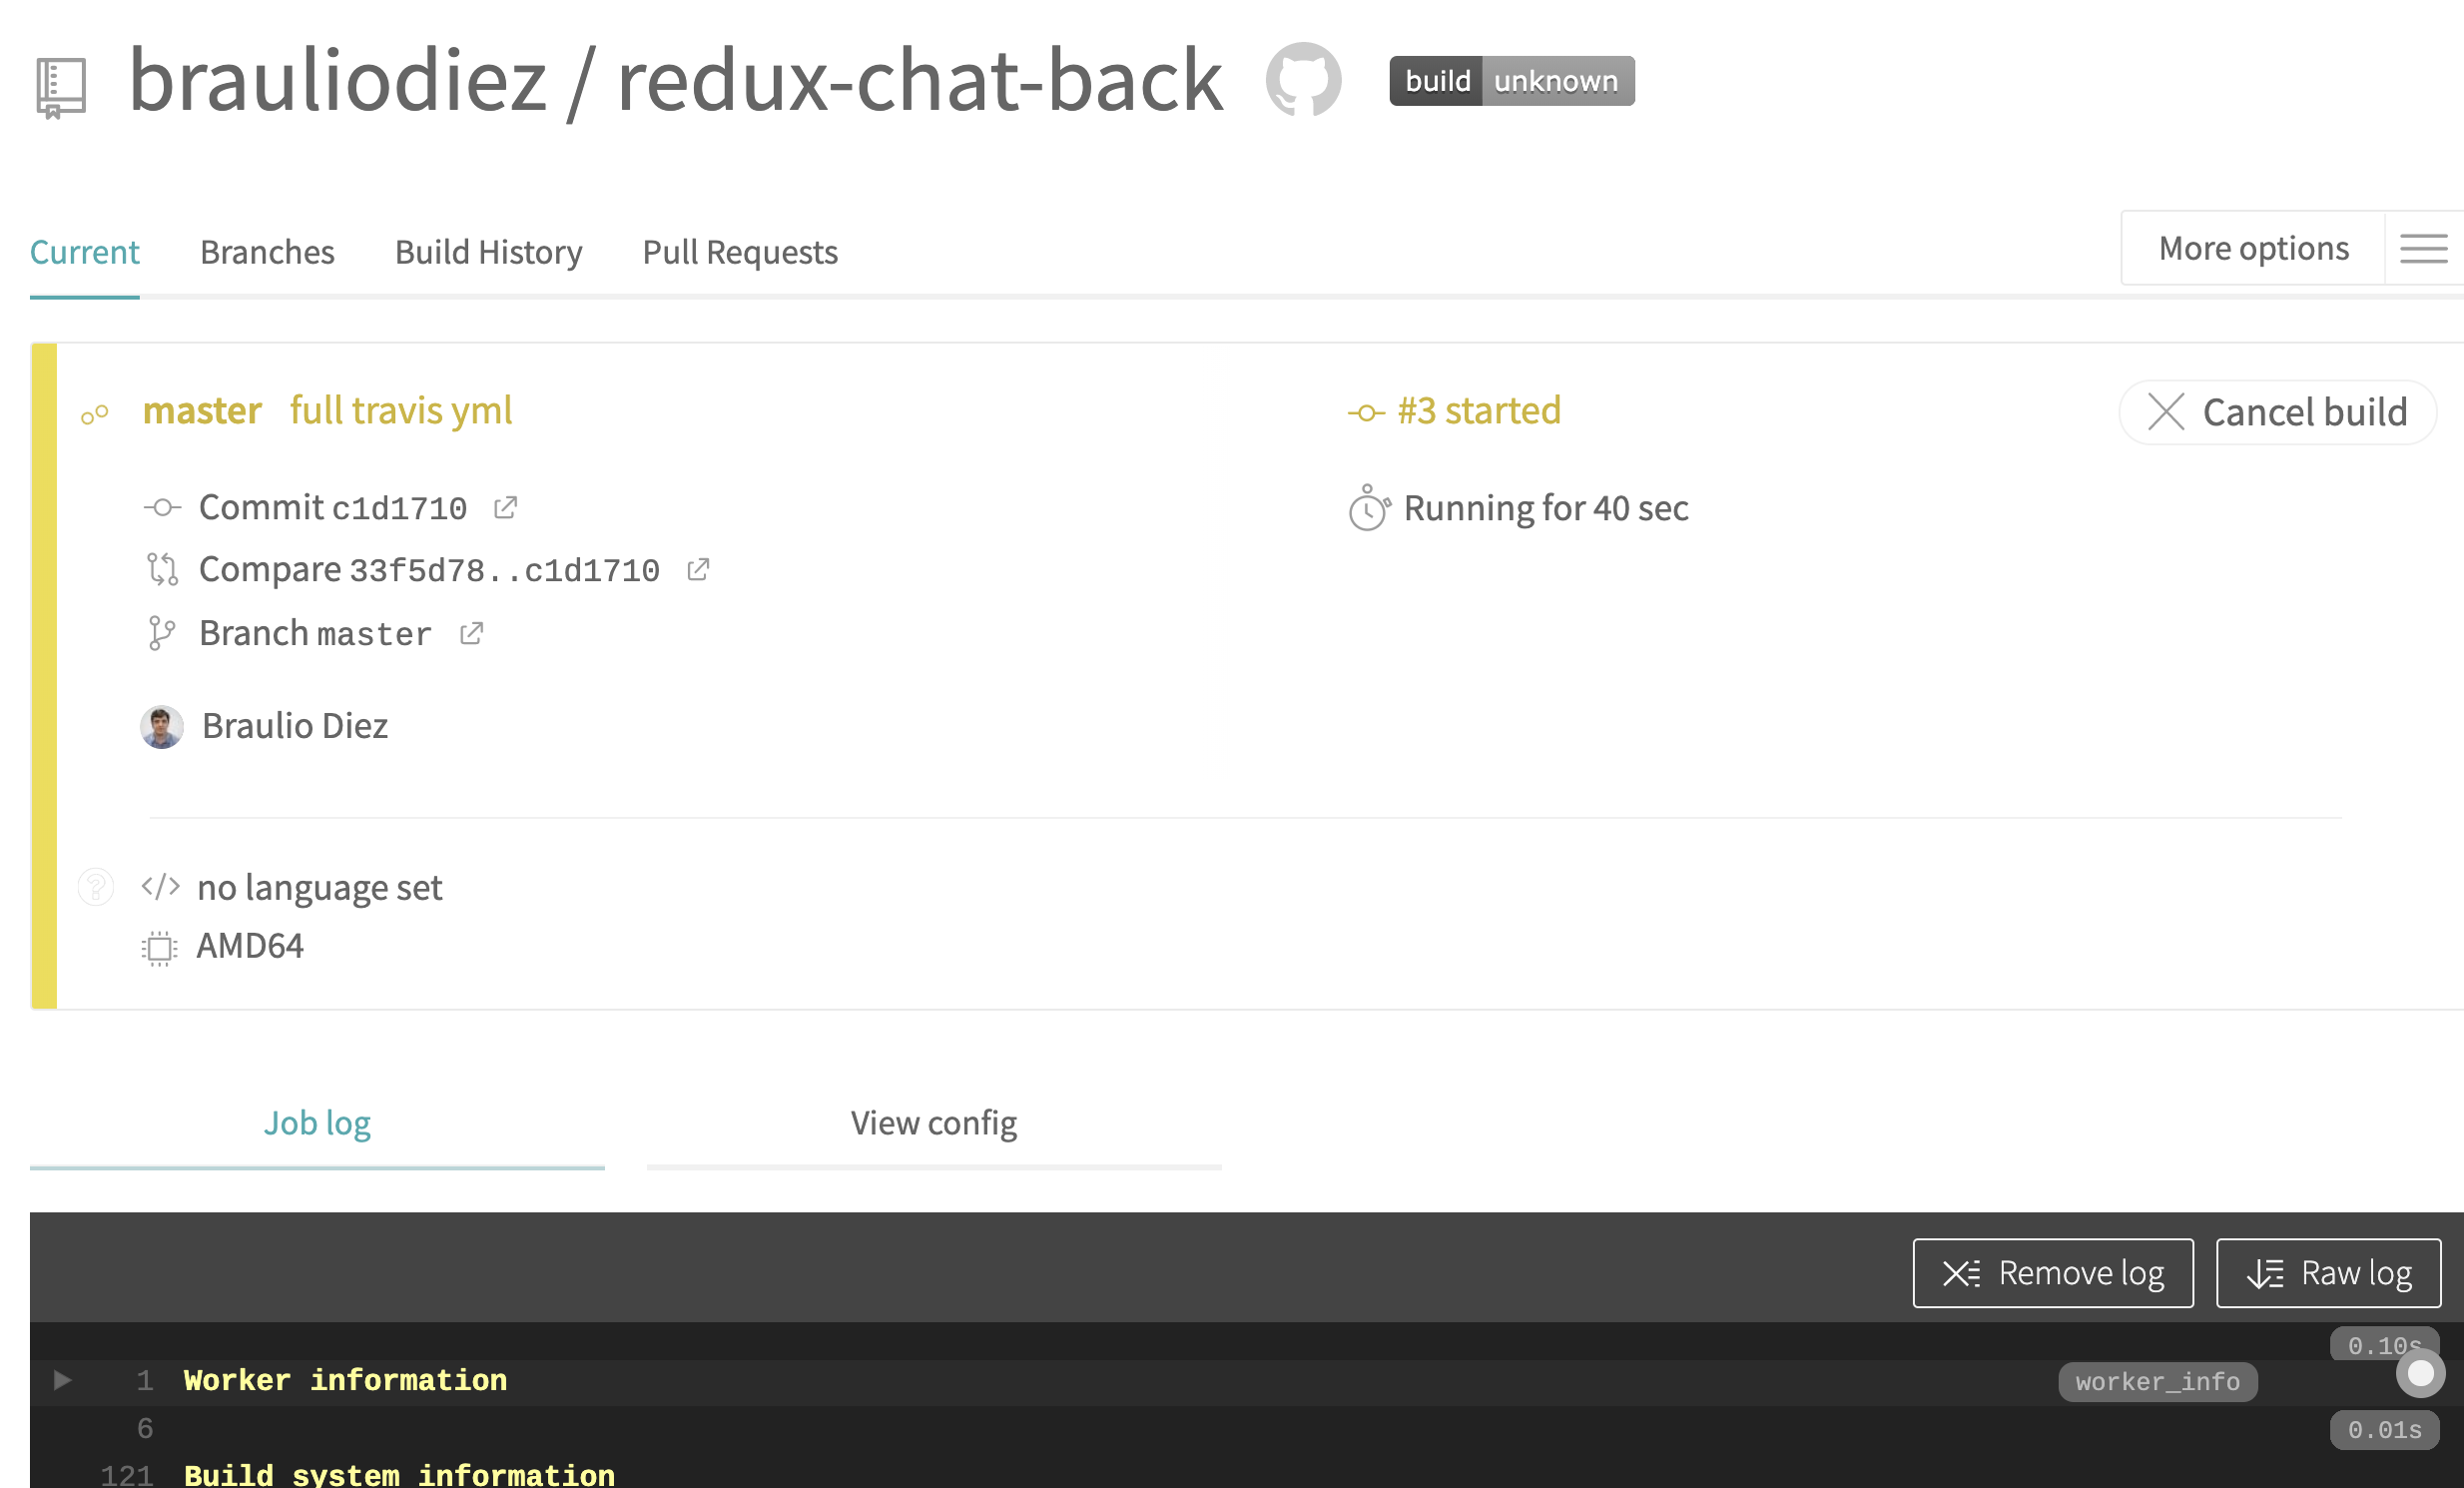
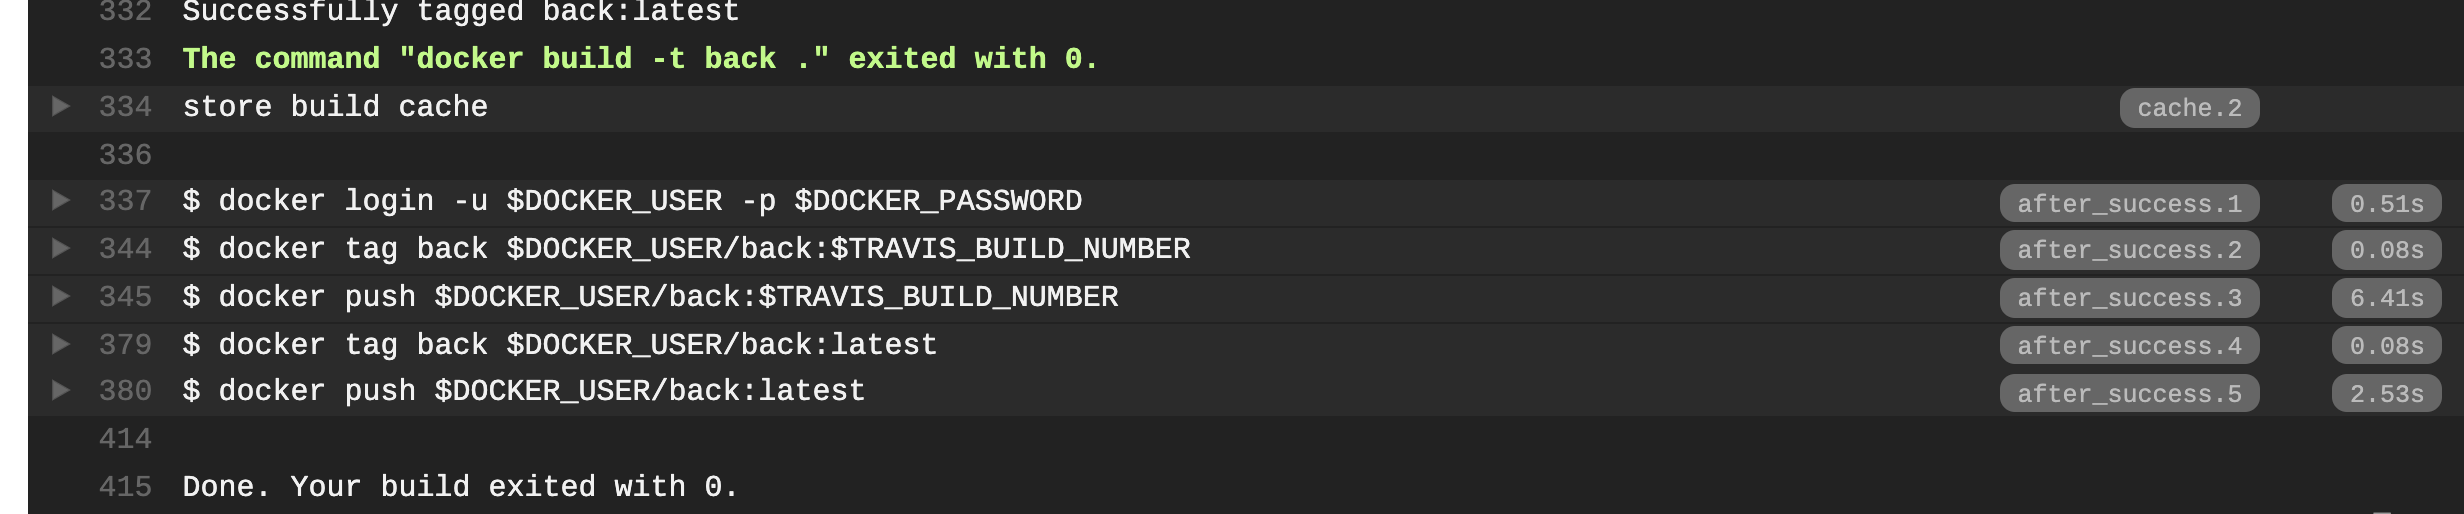
Once finished, you can check if the docker image has been generated successfully (check Travis web console):
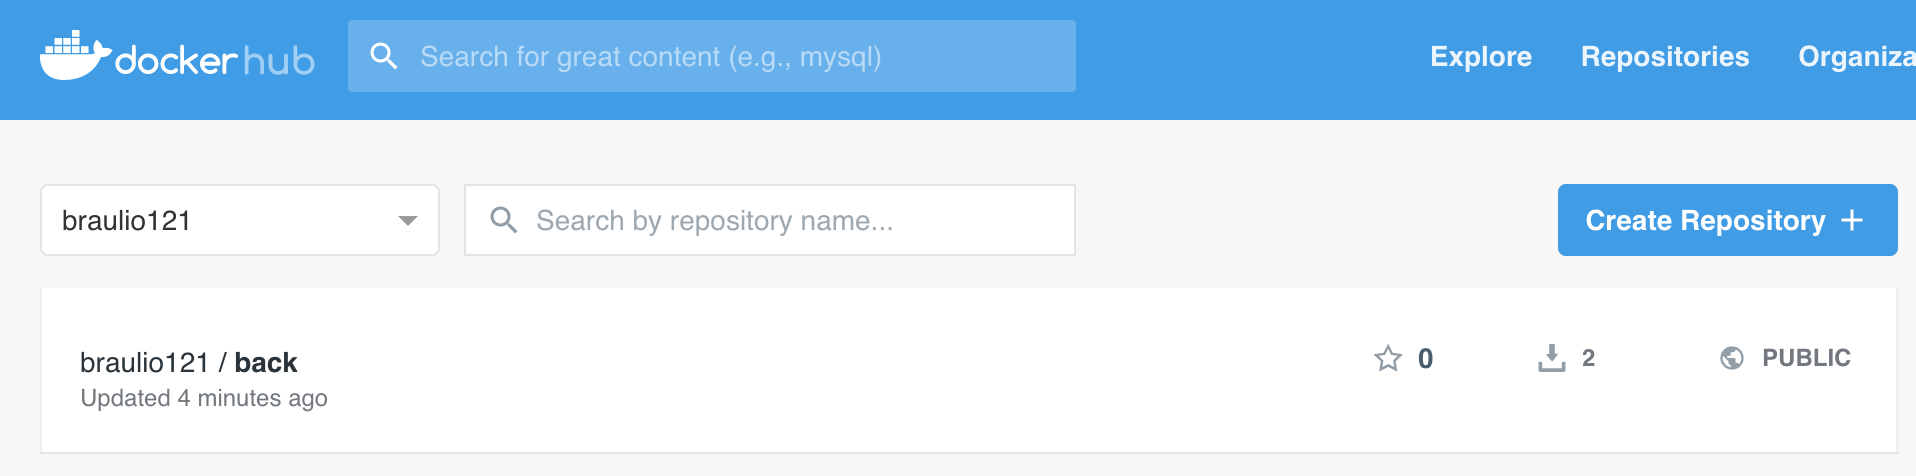
And we can check if the image is available in our Docker Hub Registry account:
Front End
The steps for creating .travis.yml are quite similar to the previous one (backend), the only difference is that we don't have
implemented unit tests (we will skip that step):
- Docker Service
- Build Docker Image
- Log into Docker Hub
- Tag Docker Images
- Push Docker Images
1. Docker Service
The frontend application will be containerized using Docker. Therefore, we will begin by indicating that the service is necessary and sudo is required, just like in the backend configuration.
+ sudo: required
+ services:
+   - docker
2. Build Docker Image
Let's build the Docker Image inside the script section.
sudo: required
services:
  - docker
script:
+ - docker build -t front .
3. Log into Docker Hub
If the Docker Image was built successfully, the next step is to log into Docker Hub.
sudo: required
services:
  - docker
script:
  - docker build -t front .
+ after_success:
+   - docker login -u $DOCKER_USER -p $DOCKER_PASSWORD
4. Tag Docker Images
As we did with the backend application, we are going to tag the current version using Travis Build number and define it as latest.
sudo: required
services:
  - docker
script:
  - docker build -t front .
after_success:
  - docker login -u $DOCKER_USER -p $DOCKER_PASSWORD
+ - docker tag front $DOCKER_USER/front:$TRAVIS_BUILD_NUMBER
+ - docker tag front $DOCKER_USER/front:latest
8. Push Docker Images
Now we only need to push the images.
sudo: required
services:
  - docker
script:
  - docker build -t front .
after_success:
  - docker login -u $DOCKER_USER -p $DOCKER_PASSWORD
  - docker tag front $DOCKER_USER/front:$TRAVIS_BUILD_NUMBER
+  - docker push $DOCKER_USER/front:$TRAVIS_BUILD_NUMBER
  - docker tag front $DOCKER_USER/front:latest
+  - docker push $DOCKER_USER/front:latest
And the final .travis.yml should be like the following:
./.travis.yml
sudo: required
services:
  - docker
script:
  - docker build -t front .
after_success:
  - docker login -u $DOCKER_USER -p $DOCKER_PASSWORD
  - docker tag front $DOCKER_USER/front:$TRAVIS_BUILD_NUMBER
  - docker push $DOCKER_USER/front:$TRAVIS_BUILD_NUMBER
  - docker tag front $DOCKER_USER/front:latest
  - docker push $DOCKER_USER/front:latest
Running multi container system
Let's check if our CI configuration is working as expected. First let's make sure that Travis has run at least one successful build (in case it hasn't, you can trigger the buld process manually or just push some dummy change to front and backend repository).
You should see in Travis build that it has been launched for Front End and Back End repos (login into travis.org):
You should see the images available in the docker registry (login into docker hub):
As we did in our previous post, we can launch our whole system using Docker Compose. However, in this case for the Front End and Back End we are going to consume the image containers that we have uploaded to the Docker Hub Registry.
The changes that we are going to introduce to that docker-compose.yml are:
version: '3.7'
services:
  front:
-    build: ./container-chat-front-example
+    image: <Docker Hub user name>/front:<version>
  back:
-    build: ./container-chat-back-example
+    image: <Docker Hub user name>/back:<version>
  lb:
    build: ./container-chat-lb-example
    depends_on:
      - front
      - back
    ports:
      - '80:80'
So the docker-compose.yml will be like:
version: "3.7"
services:
  front:
    image: <Docker Hub user name>/front:<version>
  back:
    image: <Docker Hub user name>/back:<version>
  lb:
    build: ./container-chat-lb-example
    depends_on:
      - front
      - back
    ports:
      - "80:80"
We can launch it:
$ docker-compose upIt will download the back and front images from the Docker Hub Registry (latest available). You can check out how it works by opening your web browser and typing http://localhost/ (more information about how this works in our previous post Hello Docker)
Resources
- Previous Post
- Front End repository
- Back End repository
- Travis community
- Travis enterprise
- Docker Hub
Wrapping up
By introducing this CI/CD step (CI stands for Continous Integration, CD stands for Continuos Delivery), we've got several benefits:
- The build process gets automated, so we avoid manual errors.
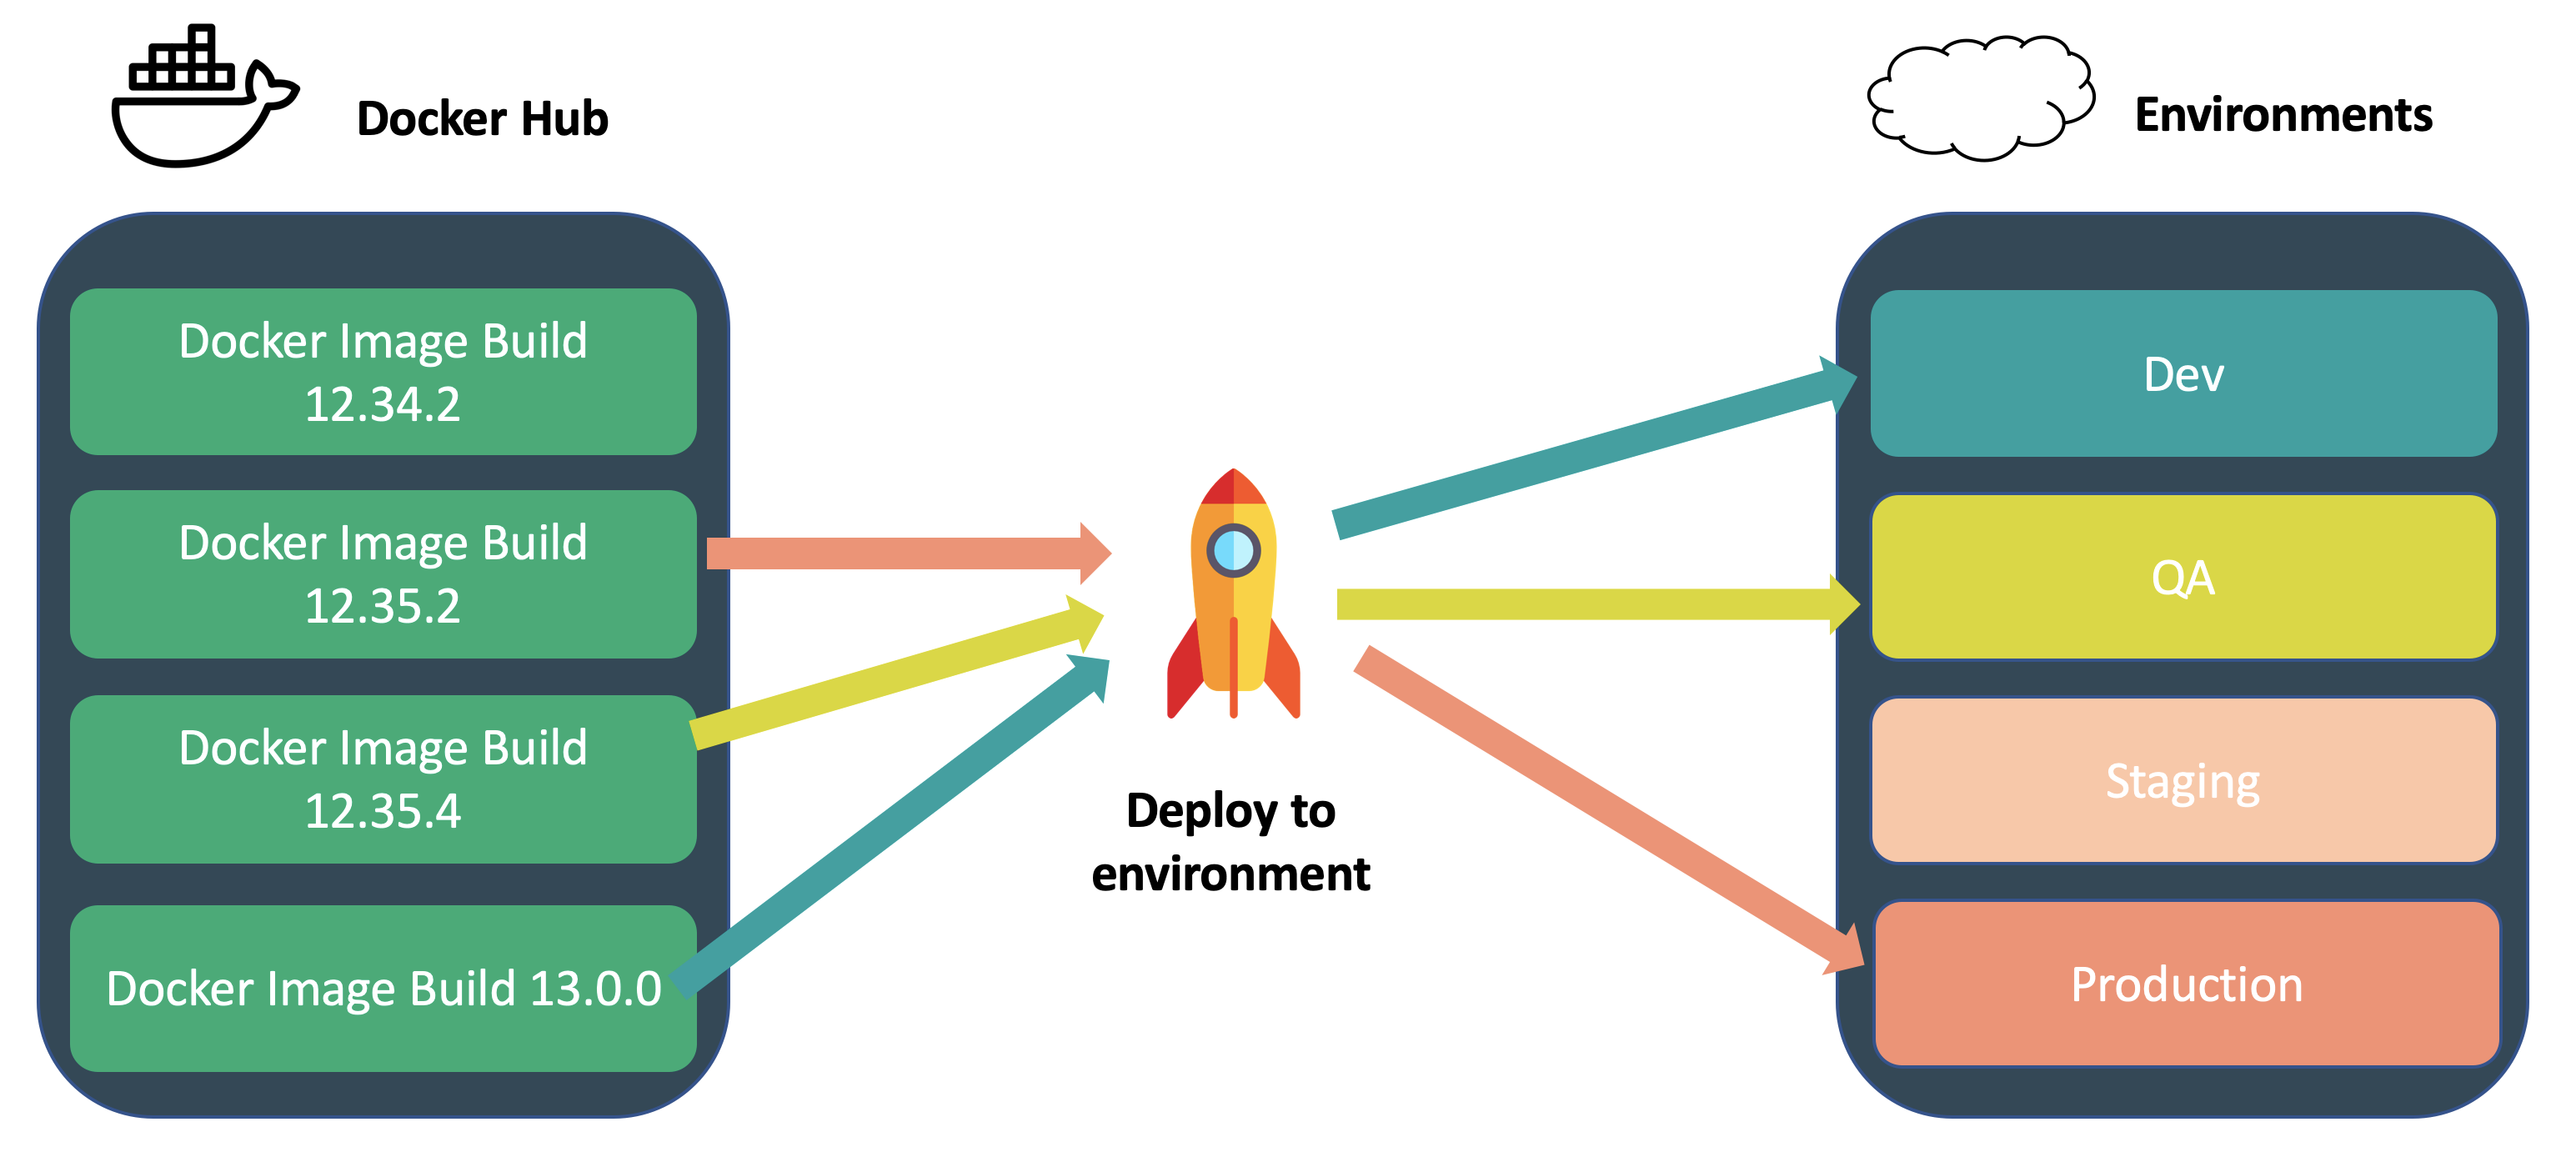
- We can easily deploy different build versions (like in a juke box see diagram).
- We can easily rollback a failed release.
- We can apply A/B testing or have Canary environments.
How about deployment? In the next post of this series we will learn how to create automated deploys using Kubernetes, so stay tuned :).
About Basefactor
We are a team of Front End developers. If you need training, coaching or consultancy services, don't hesitate to contact us.
Doers/
Location/
C/ Pintor Martínez Cubells 5 Málaga (Spain)
General enquiries/
info@lemoncode.net
+34 693 84 24 54


Copyright 2018 Basefactor. All Rights Reserved.

